
Minelab သည် X-TERRA PRO အတွက် ဆော့ဖ်ဝဲလ် အဆင့်မြှင့်တင်မှုအား သင်၏ ရှာဖွေတွေ့ရှိမှု အတွေ့အကြုံကို မြှင့်တင်ရန် အင်္ဂါရပ်အသစ်ဖြင့် မိတ်ဆက်ရခြင်းကို ကျေနပ်ပါသည်။
ဆက်တိုက် အော်တို ဆူညံသံများ ပယ်ဖျက်ခြင်း- Settings Menu တွင် ရွေးချယ်ထားသော Noise Cancel ဖြင့် လက်ခံ/ငြင်းဆိုရန် ခလုတ်ကို နှိပ်ပြီး ဖိထားပါက ခလုတ်ကို မထွက်မချင်း Noise Cancel ဆက်တိုက် လုပ်ဆောင်ပါမည်။ ဆူညံသံပယ်ဖျက်ခြင်းကို အချိန်ကြာမြင့်စွာ လုပ်ဆောင်ခြင်းသည် ချန်နယ်တစ်ခုစီရှိ ဆူညံသံများကို တိုင်းတာခြင်းအား ပိုမိုကောင်းမွန်စေပြီး အချိန်နှင့်အမျှ ပြောင်းလဲနိုင်သော ဆူညံသံရင်းမြစ်များကို ဖမ်းယူနိုင်ကာ အသုံးပြုသူကို စိန်ခေါ်မှု EMI ပတ်ဝန်းကျင်များတွင် အကောင်းဆုံးဖြစ်နိုင်ချေရှိသော ဆူညံသံပယ်ချခြင်းကို ပေးစွမ်းနိုင်သည်။
အနည်းဆုံး စနစ်လိုအပ်ချက်များ-
လက်တော့ပ် သို့မဟုတ် ဒက်စ်တော့ကွန်ပြူတာ (စမတ်ဖုန်းများနှင့် တက်ဘလက်များသည် ဤဆော့ဖ်ဝဲလ်နှင့် တွဲဖက်၍မရပါ။)
USB 2.0 အပေါက်
သံလိုက်ချိတ်ဆက်ကိရိယာဖြင့် X-TERRA PRO USB အားသွင်းကြိုး
Windows 10
ဟာ့ဒ်ဒရိုက်နေရာလွတ် 50 MB
MAC OS
10.15 ထက်ကြီးသည်။
85 MB hard drive နေရာလွတ်
မှတ်ချက် -
အပ်ဒိတ်လုပ်ငန်းစဉ်အတွင်း ထောက်လှမ်းကိရိယာကို ပိတ်ခြင်း သို့မဟုတ် ဖြုတ်ခြင်းမပြုပါနှင့်။ အပ်ဒိတ်လုပ်ငန်းစဉ်အတွက် အနှောင့်အယှက်မှန်သမျှသည် detector နှင့် MUU ကို ပြန်လည်စတင်ခြင်းဖြင့် အမြဲတမ်း အပြည့်အဝ ပြန်လည်ရရှိနိုင်မည်ဖြစ်သည်။ သို့သော်၊ အပ်ဒိတ်လုပ်ငန်းစဉ်တွင် အချို့သောအချိန်များတွင် အပ်ဒိတ်ကို နှောင့်ယှက်ပါက အသုံးပြုသူဆက်တင်များ ဆုံးရှုံးနိုင်ခြေ အနည်းငယ်ရှိသည်။
အရေးကြီးသည်- အပ်ဒိတ်လုပ်နေစဉ်အတွင်း X-TERRA PRO ကို ပိတ်ခြင်း သို့မဟုတ် ချိတ်ဆက်မှု မဖြတ်ပါနှင့်။ ဆော့ဖ်ဝဲလ် အဆင့်မြှင့်တင်မှု ထည့်သွင်းနည်းအတွက် အောက်တွင် အဆင့်ဆင့် လမ်းညွှန်ချက်များအတွက်။
1. X-TERRA PRO Minelab Update Utility ဆော့ဖ်ဝဲကို ဒေါင်းလုဒ်လုပ်ပြီး အပလီကေးရှင်းကိုဖွင့်ပါ။ | 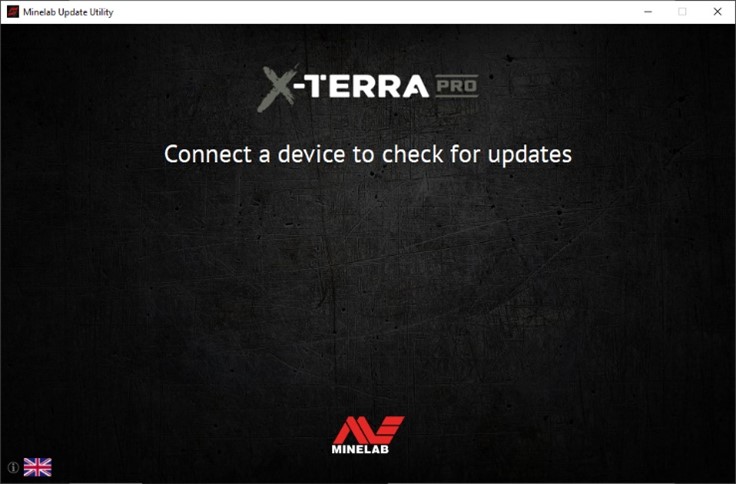 |
2. သံလိုက်အားသွင်းကြိုးကို အသုံးပြု၍ စက်ပစ္စည်းကို ကွန်ပျူတာ USB အပေါက်နှင့် ချိတ်ဆက်ပြီး ဖွင့်ပါ။ | 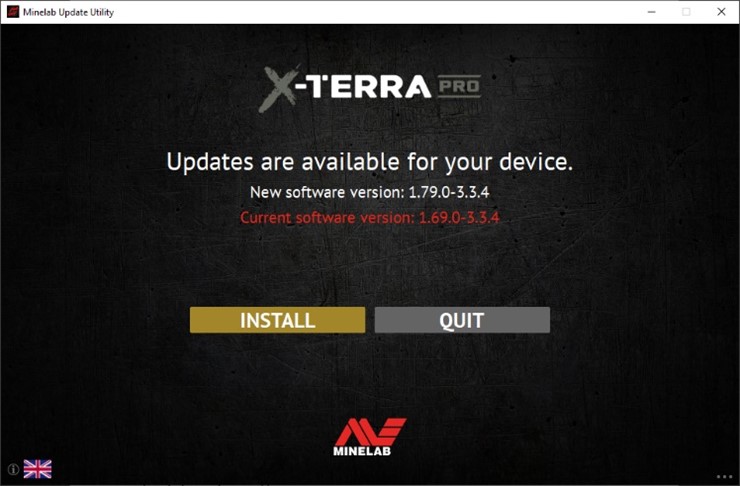 |
4. စက်သည် အပ်ဒိတ်ဖြစ်နေပြီဆိုလျှင်၊ အပလီကေးရှင်းသည် 'သင်၏စက်ပစ္စည်းသည် ခေတ်မီနေသည်' ကို ပြသမည်ဖြစ်သည်။ နှင့် လျှောက်လွှာမှထွက်ရန် သင့်အား နှိုးဆော်ထားသည်။ | 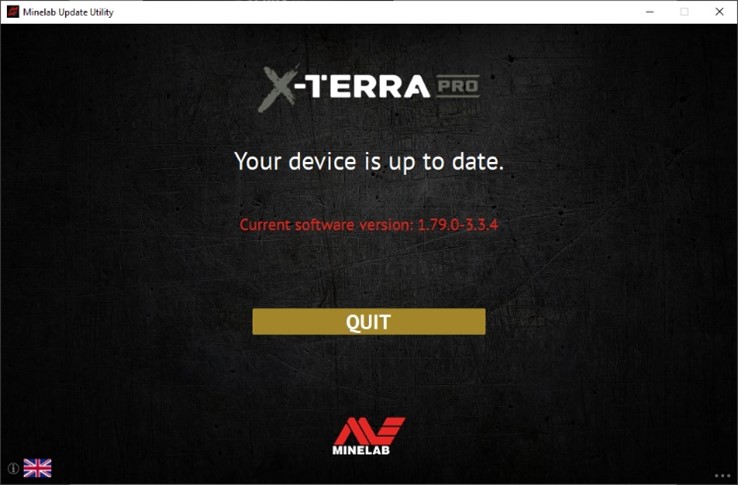 |
5. အပ်ဒိတ်ကိုစတင်ရန် INSTALL ကိုနှိပ်ပြီးနောက်၊ MUU အပလီကေးရှင်းဝင်းဒိုးသည် အပ်ဒိတ်လုပ်ငန်းစဉ်ကာလအတွင်း တပ်ဆင်မှုတိုးတက်မှုဘားကိုပြသမည်ဖြစ်သည်။ X-TERRA PRO မျက်နှာပြင်သည် အပ်ဒိတ်၏ပထမအပိုင်းအတွက် 'PC' ကိုပြသမည်ဖြစ်သည်။ ထို့နောက် core detector အပလီကေးရှင်းဆော့ဖ်ဝဲကို အပ်ဒိတ်လုပ်ပြီး ပြန်လည်စတင်ချိန်တွင် မျက်နှာပြင်သည် ကွက်လပ်ဖြစ်သွားပါမည်။ X-TERRA PRO ထိန်းချုပ်မှုဘောင်၏ ဘယ်ဘက်အပေါ်ထောင့်ရှိ အစိမ်းရောင် LED သည် အပ်ဒိတ်အပိုင်းကို လုပ်ဆောင်နေချိန်တွင် လျင်မြန်စွာ မှိတ်တုတ်မှိတ်တုတ်နေမည်ဖြစ်ပါသည်။ | 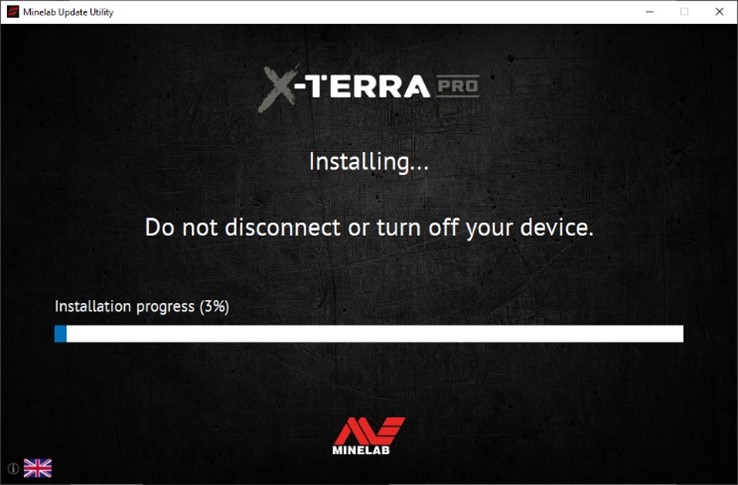 |
6. တပ်ဆင်မှု လေးမိနစ်ခန့် ကြာပါမည်။ အပ်ဒိတ်၏အဆုံးတွင်၊ X-TERRA PRO သည် ပြန်လည်စတင်မည်ဖြစ်ပြီး၊ ထို့နောက်တွင် MUU သည် detector ကိုချိတ်ဆက်မှုဖြုတ်ပြီး အပလီကေးရှင်းမှထွက်ရန်သင့်အားတောင်းဆိုမည်ဖြစ်သည်။ | 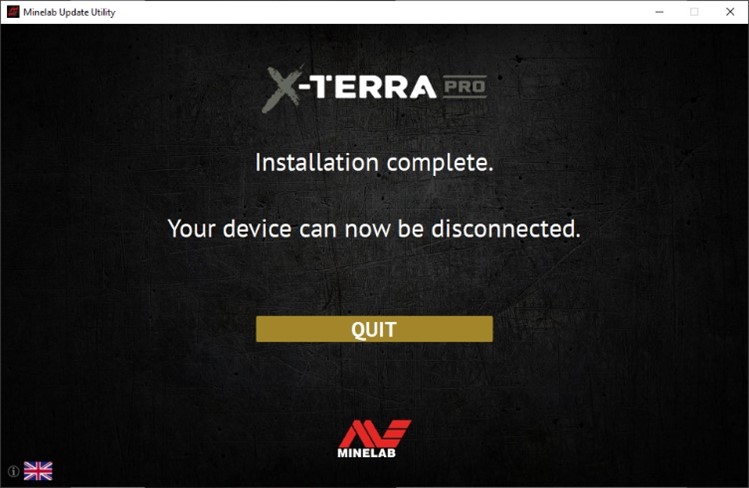 |
7. MUU ဝင်းဒိုး၏ အောက်ခြေညာဘက်ထောင့်ရှိ အစက်သုံးစက်ကို နှိပ်ပြီး ယခင်ဗားရှင်းကို ရွေးချယ်ပြီး ထည့်သွင်းရန် ညွှန်ကြားချက်များကို လိုက်နာခြင်းဖြင့် ယခင်ဆော့ဖ်ဝဲဗားရှင်းကို ပြန်လည်ရယူနိုင်သည်။ | 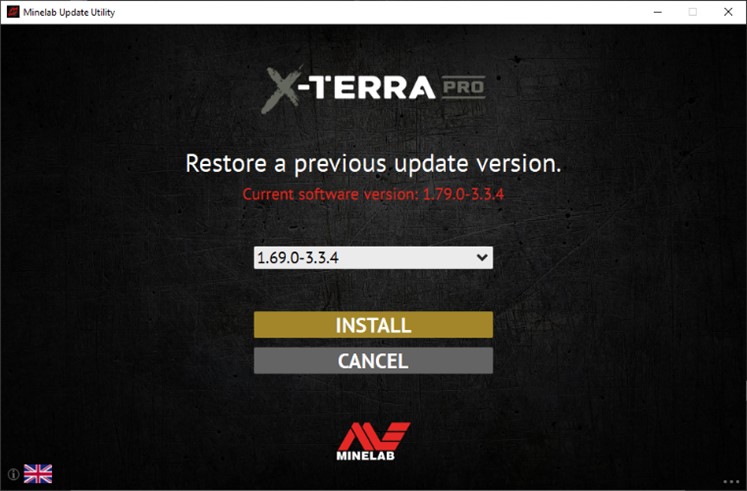 |
ဖန်သားပြင်ရိုက်ချက်များသည် ပုံဥပမာအတွက်သာဖြစ်သည်။ တကယ့်ဖန်သားပြင်များသည် ပြသထားသည့်အရာများနှင့် အနည်းငယ်ကွဲပြားနိုင်သည်။
အပ်ဒိတ်လုပ်ငန်းစဉ်အတွင်း အမှားအယွင်းတစ်ခု ကြုံတွေ့ပါက၊ ၎င်းကို ပြန်လည်ရယူနိုင်ပါသည်။ အမှားအယွင်းများဖြစ်စေသော အဖြစ်များဆုံးအကြောင်းရင်းမှာ အပ်ဒိတ်လုပ်နေစဉ်အတွင်း PC နှင့် စက်ပစ္စည်းကြားတွင် အဆက်မပြတ် ကေဘယ်လ်ချိတ်ဆက်မှုဖြစ်သည်။ အပ်ဒိတ်တစ်ခု နှောင့်ယှက်ပါက၊ detector သည် ဗလာမျက်နှာပြင်နှင့် အစိမ်းရောင် LED မှိတ်တုတ်မှိတ်တုတ်ဖြင့် ပါဝါတက်နိုင်သည်။ ၎င်းသည် detector သည် အပ်ဒိတ်မုဒ်တွင်ရှိပြီး အပ်ဒိတ်တစ်ခုကို လက်ခံရန် အသင့်ဖြစ်နေပြီဟု ဖော်ပြသည်။
Minelab Update Utility (MUU) သည် detector နှင့် မချိတ်ဆက်ပါက၊ MUU လုပ်ဆောင်နေသည့် သာဓကတစ်ခုသာရှိပြီး detector ၏ charge port တွင် terminals များကို သန့်ရှင်းရေးလုပ်ပါ။ သံလိုက် USB/အားသွင်းကြိုးမှတစ်ဆင့် သင်၏ detector ကို သင့် PC နှင့် တိုက်ရိုက်ချိတ်ဆက်ထားကြောင်း သေချာပါစေ။ ထောက်လှမ်းကိရိယာပေါ်တွင် မှန်ကန်စွာထိုင်ကြောင်း သေချာစေရန် သံလိုက်ချိတ်ဆက်ကိရိယာကို စစ်ဆေးပြီး MUU ကို ပြန်လည်စတင်ပါ။ MUU သည် detector သို့မချိတ်ဆက်နိုင်သေးပါက၊ detector ကိုပိတ်ပြီး ချိတ်ဆက်မှုဖြုတ်ပါ၊ MUU ကိုပိတ်ပြီး ပြန်လည်စတင်ပါ၊ ထို့နောက် ပြန်လည်ချိတ်ဆက်ပြီး သင့် detector ကိုဖွင့်ပါ။
အပ်ဒိတ်လုပ်နေစဉ် ပြဿနာရှိပါက၊ အောက်ပါအဆင့်များကို စမ်းကြည့်ပါ။
သင့်တွင် ပြဿနာများရှိနေသေးပါက၊ သင်၏ဒေသခံ Minelab ဝန်ဆောင်မှုစင်တာသို့ ဆက်သွယ်ပါ။
Minelab Service ဆက်သွယ်ရန်အချက်အလက်။
Q: Why is the Minelab Update Utility (MUU) not connecting to my detector?
A: Make sure your detector is connected to your PC directly via the magnetic USB/Charging cable then switch the detector on. Avoid the use of any USB hubs and connect the detector directly to a USB port on the PC. Ensure there’s only one instance of the MUU running and check that the magnetic connector is properly seated on the detector. Try re-starting the MUU. If you still can’t connect then switch off the detector, close and re-start the MUU. Re-connect and switch on your detector then try again.
If the above does not work then delete the downloaded MUU then re-download a new copy and try again.
Q: What happens if the detector disconnected while installing the upgrade?
A: The MUU can recover the detector functionality after any disconnection during upgrade. Switch off the detector then close and restart the MUU Connect the detector to your computer and switch it on. The detector screen may remain blank, but the MUU will see the detector and offer an upgrade. Install the upgrade and the detector will recover.
Q: What happens if I want to downgrade back to the old version?
A: The latest released MUU contains all released versions of X-TERRA PRO software – to downgrade, click on the three dots in the bottom right of the MUU screen, select the version you want to downgrade to, and click install.
Q: Help! My detector is non-functional after an upgrade!
A: Don’t worry, the MUU can always recover the detector in the event an upgrade is interrupted. Simply power on the detector, connect to a PC running the MUU and re-start the upgrade.
Q: Is this update also applicable to the X-TERRA ELITE?
A: No, this update is only applicable to the X-TERRA PRO. X-TERRA ELITE is shipped with the latest software.